Buying a fish finder is something that you should not take lightly after all, they can be expensive. So try and follow these tips!
Choose the right fish finder display
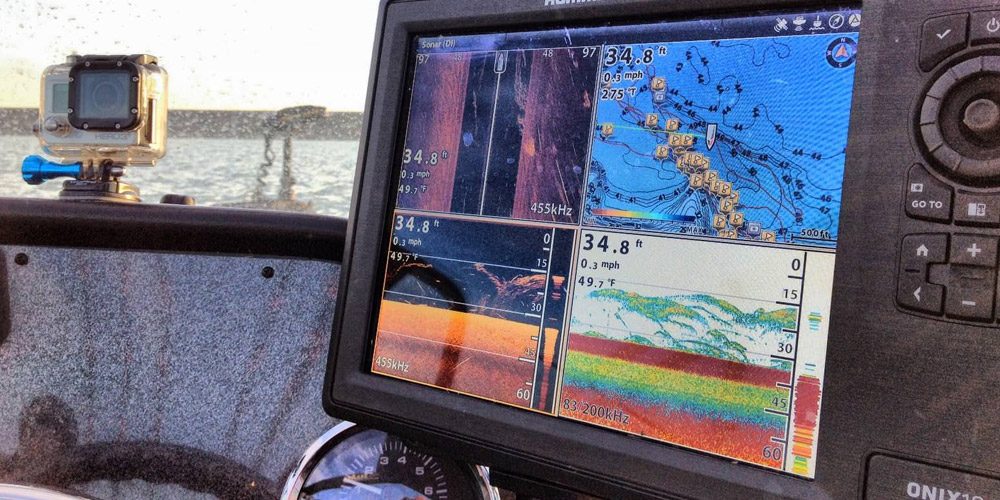
The choice of the screen is a matter mainly of size. Depending on the functions of the equipment, with a larger screen, it will be more convenient to see several images at once, such as two different probe technologies or the map and the probe. Most fish finders, work with different technologies, and therefore, two different types of images or even three (GPS, conventional probe, and ultrasound vision) may appear on the screen, for example. Try and pick a fish finder with a specific screen or display technology that you are looking for. The bigger the screen, the easier it will be for you to interpret the different types of probing images, and consequently, you can find fish much more easily.
Get to know the cone angle of the fish finder
The cone angle of a fish finder determines its underwater coverage. The higher the cone angle, the more area is covered. A large cone angle is often used to fish in shallow or medium-deep waters. A low cone angle reaches more depth but shows fewer fish and structures in its narrow beam.
Learn about transmission frequency
The transmitters for the fish finder probes are in charge of emitting the waves towards the seabed that will give you the visualization of the information on the screen, without them, or with an insufficient transmission power, your fish finder will not work correctly.
Frequency 50 kHz: Useful for use at sea. It works with great depths, more than 200m and has a large cone angle to allow more coverage at great depths. It is not useful for shallow waters since its resolution is much lower compared to higher frequencies. It is usually used in very deep salty waters and has a wider coverage angle. The absorption rate is higher in high-frequency sounds than in low ones.
200 kHz frequency: A high signal resolution allows easier separation of the bottom structure and the bodies of fish in shallow waters up to 200m. A high frequency limits the range of reach and a lower cone angle limits the amount of bottom searching in deep water. For almost all freshwater and many saltwater applications, 200 kHz is the best probe frequency. It works better in shallow water and at a certain speed, in addition to showing less noise and unwanted echoes.
Frequency 83 kHz: These have a good angle in low or medium depth waters, this frequency has got a good balance between 50 kHz and 200 kHz. However, it does not have the same resolution of objects as the 200 kHz resolution or the depth offered by the 50 kHz frequency.
Determine what type of installation you want:
There are four types of fish finder installation, these are: Stern mount, interior mount, hull bolt, and motor mount. Each type of fish finder installation has got its pros and cons and will depend on the type of fish finder that you get. For example, interior mounted fish finders are recommended with 200 kHz transmitters since there is a loss of signal strength. It is common to use them with small boats that only fish in shallow waters.
Do your research
There are hundreds if not thousands of fish finder reviews on the internet, so take the time and do your research to find out which one is best for you. There are different types of fish finders for all sorts of fishing so with that in mind, first of identify the type of fishing you will be doing, ie, River vs Ocean vs Lake, shallow water, deep water, fresh or salt. With this in mind you should be able to find the most suitable fish finder for you.


